​Create a Picture Library

(back to Site Owner Help)

Go to Site Contents (either from the Quick Launch menu or from the cog drop down menu).  click add an app

addanapp.JPG 

On the Your Apps page, find the Picture Library app

picturelibrary.JPG 

Name your library and click Create

libraryname2.JPG 

Adding pictures to your picture library


In Site Contents, locate your picture library and open it up (by clicking on the tile)

piclib4.JPG 

Click on new picture and browse to the picture on your computer that you want to upload

newpicture.JPG 

Or you can drag and drop it right from a folder on your computer

draganddrop.jpg
 

Another way to do it is to click on Files in the ribbon

files.JPG 

and then Upload Document

uploaddocument.JPG
 

This last option gives you the option of creating sub-folders for your Picture Library.

You now have a picture in your Picture Library

picturelibrary2.JPG 

To add a title, description, or keywords, hover over the tile above until you see the ellipsis:

hover.JPG 

And then Edit Properties

editproperties.JPG 

From here, you can add title, date taken, description and keywords if you want, then click OK. Title will be used as a caption if you select a slideshow view

(back to Site Owner Help)

​Add a Slide show to your site

(back to Site Owner Help)

Go to Site Contents (either from the Quick Launch menu or from the cog drop down menu).  click add an app

addanapp.JPG 

On the Your Apps page, find the Picture Library app

picturelibrary.JPG 

Name your library and click Create

libraryname2.JPG 

Adding pictures to your picture library


In Site Contents, locate your picture library and open it up (by clicking on the tile)

piclib4.JPG 

Click on new picture and browse to the picture on your computer that you want to upload

newpicture.JPG 

Or you can drag and drop it right from a folder on your computer

draganddrop.jpg
 

Another way to do it is to click on Files in the ribbon

files.JPG 

and then Upload Document

uploaddocument.JPG
 

This last option gives you the option of creating sub-folders for your Picture Library.

You now have a picture in your Picture Library

picturelibrary2.JPG 

To add a title, description, or keywords, hover over the tile above until you see the ellipsis:

hover.JPG 

And then Edit Properties

editproperties.JPG 

From here, you can add title, date taken, description and keywords if you want, then click OK. Title will be used as a caption if you select a slideshow view

addtitle.JPG
(back to Site Owner Help)

​Add Pictures to your Site

(back to Site Owner Help)

You can use pictures you've uploaded for the site logo, to create a slide show, or to display photos.

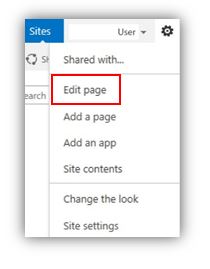
To add a picture to a page, go to the page where you want to add the picturepicturepage.JPG

and either click on the cog menu > Edit page

editpage.JPG 

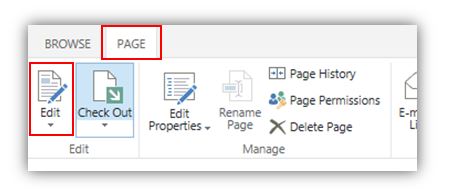
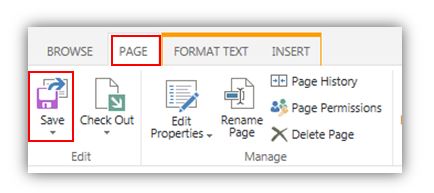
OR from the Page tab in the upper left corner, click Edit

editpage2.JPG 

Once your page is in edit mode, click on the page where you want to insert the picture.
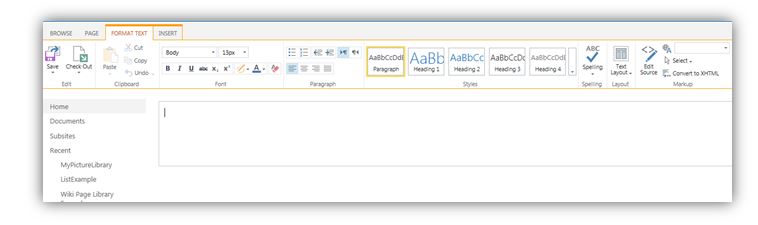
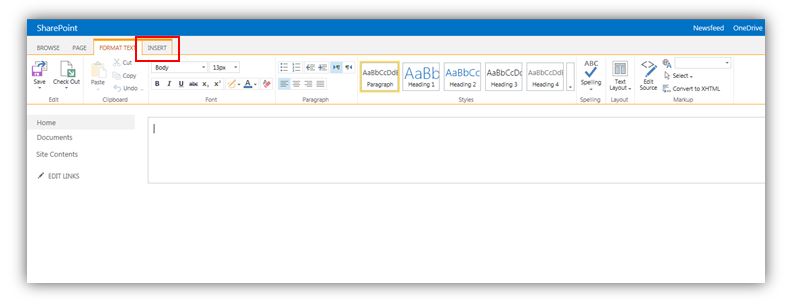
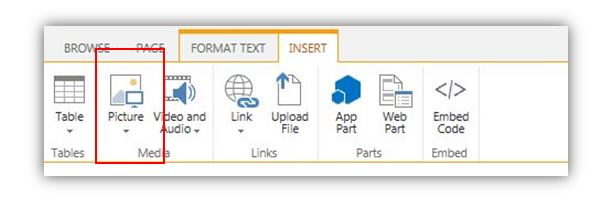
editmode.JPG 

Click on Insert on the top ribbon

insert.JPG 

And then click on Picture

picture.JPG
 

From here, there are several different ways you can do this.  You can just add a picture directly from your computer, using the URL that points to the picture somewhere else or from somewhere in SharePoint)

picture2.JPG
 

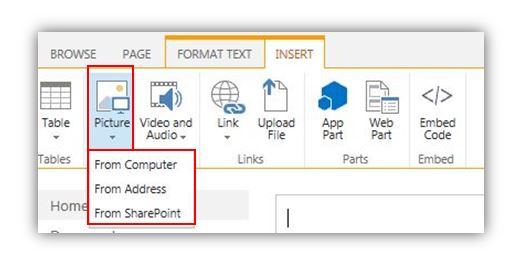
Adding a picture already in SharePoint

Insert > Picture > From SharePoint

sp.JPG 

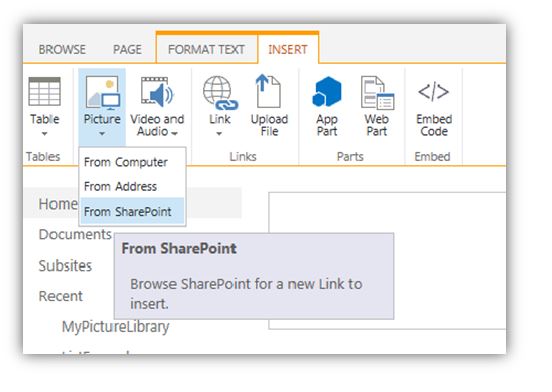
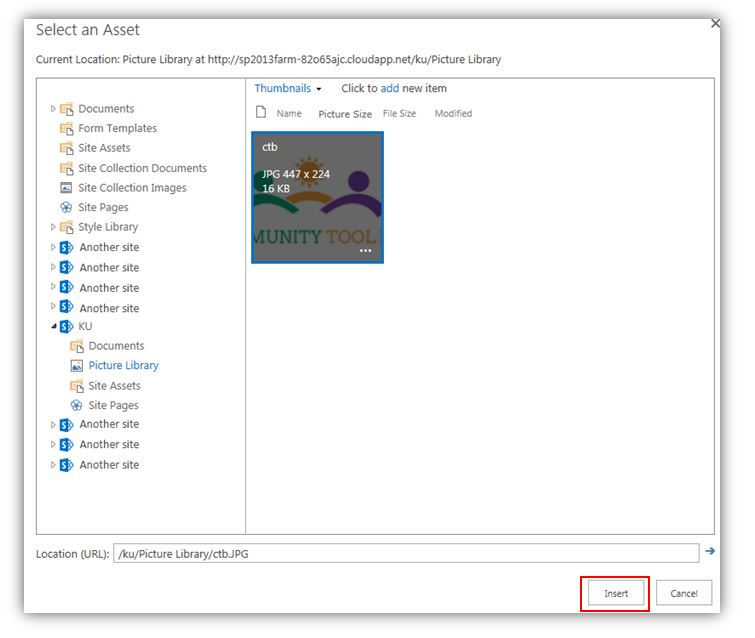
Then navigate to where the picture is in SharePoint, select it and click Insert.

sharepoint.JPG
 

Adding a picture from your computer


Insert > Picture > From Computer

computer1.JPG 

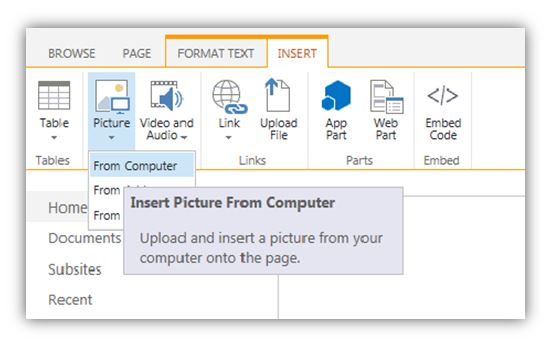
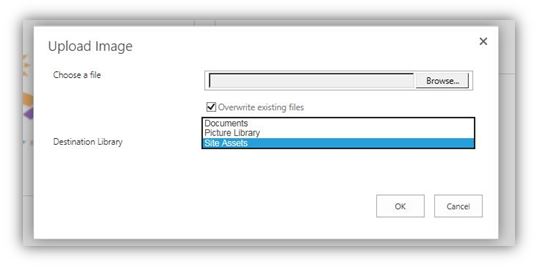
Then browse to where the picture is on your computer and click OK

browse.JPG 

*Note that if you insert the picture using this method, the picture will, by default, go to the Site Asset Library.  You can change where the picture will be stored, but the point is…if you use this method, take note of where the picture is stored so you can find it again, if needed. 
siteassets.JPG


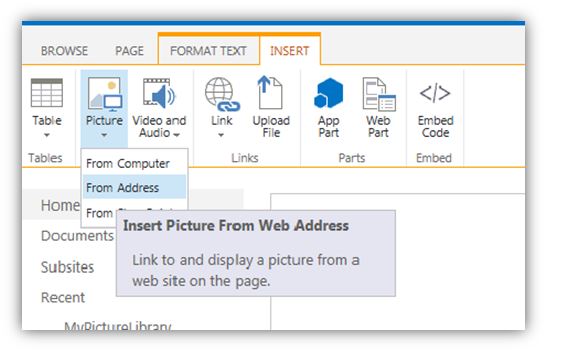
Adding a picture from an address

Insert > Picture > From Address

address1.JPG 

Type in the URL to the picture and type in some alternative text to display in case the image cannot.
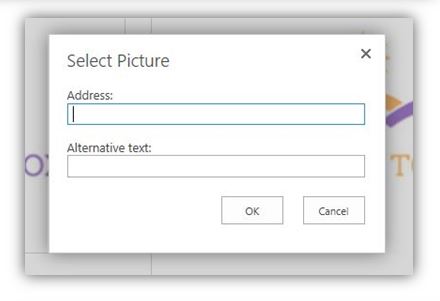
selectpicture2.JPG 

and click OK

Once the picture is on your page, click on the Page tab in the upper left corner and Save

save.JPG 

And you can now see the pictures on your page

finalpicture.JPG
(back to Site Owner Help)